Craft Pro Easter Eggs: Unique Painting & Decorating Ideas
Easter isn't just about chocolate bunnies and egg hunts; it's a glorious opportunity to unleash your inner artist and transform humble eggs into miniature masterpieces. While store-bought dye kits certainly have their place, for those who see every egg as a tiny, blank canvas brimming with potential, a world of creative possibilities awaits. This year, move beyond the dip-and-dye routine and discover an exciting array of Easter Egg Painting Ideas that will impress, inspire, and add a truly personal touch to your spring celebrations.
Whether you're a seasoned crafter or just looking to explore your artistic side, the beauty of painting and decorating Easter eggs lies in the endless mediums and techniques at your fingertips. From the delicate wash of watercolors to the bold precision of paint markers, and the tactile allure of puff paint, there's a method for every style and skill level. Let's dive into a vibrant collection of ideas that will help you craft truly unique Easter eggs.
Beyond the Dye Kit: Essential Supplies & Preparation
Before you embark on your artistic journey, setting the stage with the right materials and proper preparation is key to achieving stunning results. Thinking beyond the basic dye kit opens up a professional palette of tools.
Choosing Your Canvas: Hard-Boiled vs. Blown Eggs
- Hard-Boiled Eggs: Ideal for immediate enjoyment and temporary displays. They're sturdy and easy to handle, perfect for family crafting sessions. However, they are perishable and won't last beyond a week in the refrigerator.
- Blown Eggs: If you want to create keepsakes that can be enjoyed year after year, blown eggs are your best bet. Carefully poke a small hole at each end of a raw egg, use a needle or skewer to break the yolk, and then blow out the contents. Rinse the shell thoroughly and allow it to dry completely before decorating. Blown eggs are delicate, so handle with care!
Gathering Your Artistic Arsenal
To bring your ambitious Easter Egg Painting Ideas to life, consider stocking up on these versatile supplies:
- Paints:
- Watercolors: Perfect for soft, translucent effects, from dreamy washes to delicate patterns.
- Acrylic Paints: Offer vibrant, opaque coverage and dry quickly. Great for bold designs, layering, and intricate details.
- Puff Paint (3D Fabric Paint): Adds fantastic texture and dimension, ideal for raised dots, lines, and playful designs.
- Craft Paint: Often a good, inexpensive option for base coats or solid colors.
- Markers & Pens:
- Fine-Tipped Paint Pens: Offer excellent control for crisp lines, intricate patterns, and detailed illustrations. Available in various colors and metallic finishes.
- Permanent Markers (e.g., Sharpies): Great for bold outlines, graphic designs, and simple patterns. Ensure good ventilation when using.
- Brushes & Tools:
- Assorted Paintbrushes: Flat-tipped for broad strokes and gingham patterns; fine-tipped for delicate details; round brushes for general application.
- Small Sponges: For textured effects or dabbing colors.
- Stamps: Small craft stamps (like an "X" stamp for cross-stitch designs) can create repetitive patterns effortlessly.
- Palettes: For mixing paints.
- Water Cups & Paper Towels: For rinsing brushes and blotting.
- Drying Rack: Essential for letting painted eggs dry without smudging. An old egg carton works wonders.
- Additional Supplies: Painter's tape for crisp lines, stencils, clear sealant/varnish (for blown eggs), pencil for sketching designs, and a protective surface to work on.
Unleash Your Inner Artist: Diverse Easter Egg Painting Ideas
Now, let's dive into some truly inspiring techniques that will elevate your egg decorating game, offering creative ways to explore the realm of Easter Egg Painting Ideas.
1. Watercolor Wonders: Soft Hues & Blended Beauty
Watercolors bring an ethereal quality to Easter eggs, allowing for beautiful blending and subtle color shifts.
- Classic Watercolor Washes: Start by brushing clean water onto a section of your egg. While it's still wet, gently touch your brush loaded with watercolor paint to the wet area. The color will bloom and spread. Continue wetting different sections and applying various colors, letting them bleed into one another for a dreamy, organic effect. Experiment with layering lighter washes first, then adding more saturated colors once the initial layer is dry for depth.
- Cheerful Gingham Eggs: Nothing says spring like a crisp gingham pattern. Using watercolor paints and a flat-tipped paintbrush, apply parallel lines of your chosen color onto a white egg. Once dry, paint another set of parallel lines perpendicular to the first, using the same color. Where the lines overlap, the color will intensify, creating that signature gingham look. This technique works best with a light touch and allowing each layer to dry.
2. Bold & Graphic Designs: Precision & Impact
For those who prefer crisp lines, strong patterns, and a modern aesthetic, paint pens and permanent markers are your best friends.
- Paint Marker Patterns: With fine-tipped paint pens, the world is your oyster. Create repeating patterns like intricate triangles, cheerful hearts, bold chevrons, or even complex mandalas. The precision of these pens allows for incredibly detailed work and vibrant, opaque lines. Consider sketching your design lightly with a pencil first for perfect symmetry.
- Graphic Black-and-White Eggs: Embrace a minimalist yet striking look by using black paint pens or permanent markers on white eggs. Think abstract patterns, comic-book inspired illustrations, or bold geometric designs reminiscent of graphic novels. The contrast creates an immediately eye-catching effect.
- Confetti Painted Eggs: Achieve a festive, celebratory look by drawing short, scattered lines all around your eggs using paint pens in various bright hues. The randomness and burst of color evoke the joy of confetti.
- Expressive Emoji Easter Eggs: How are you feeling this spring? Express it! Paint your eggs yellow as a base, then use black and red paint markers to draw a range of emoji faces. From smiling to winking or even a silly face, these eggs are sure to bring a chuckle and are incredibly fun for all ages.
- Tip: For more intricate and imaginative concepts, especially using markers, delve into Beyond Dye Kits: Creative Easter Egg Paint & Marker Designs for further inspiration.
3. Textural & Dimensional Touches: Adding Depth & Whimsy
Elevate your eggs with techniques that add a tactile element, making them pop with interesting textures.
- Puffy Polka-Dot Easter Eggs: Start by dyeing or painting your eggs a solid background color. Once dry, use puff paint to create raised 3D dots. You can stick to a single color for a classic look or use multiple colors for a playful, confetti-like polka dot design. The raised texture adds a delightful sensory element.
- Charming Cross-Stitch Eggs: This surprisingly simple technique creates a lovely, handcrafted feel. Using a small "X" shaped stamp and your desired ink color, stamp a repeating cross-stitch pattern across your egg. Once the ink is completely dry, take a fine-tipped permanent marker (like a Sharpie) to add small lines or details, giving the "stitches" more definition and a convincing embroidered appearance.
- "Lettuce" Eggs: For a truly unique and skillful challenge, transform green-dyed eggs into realistic lettuce leaves. Use a thin-tipped white paint pen to carefully draw the intricate vein patterns found on lettuce. With a steady hand and keen observation, you can achieve a remarkable trompe l'oeil (trick of the eye) effect, making your eggs look like they just came from the garden.
4. Elegant & Coordinated Themes: Harmonious Hues & Patterns
Sometimes, a cohesive theme or a simple, elegant design is all you need to create a stunning display.
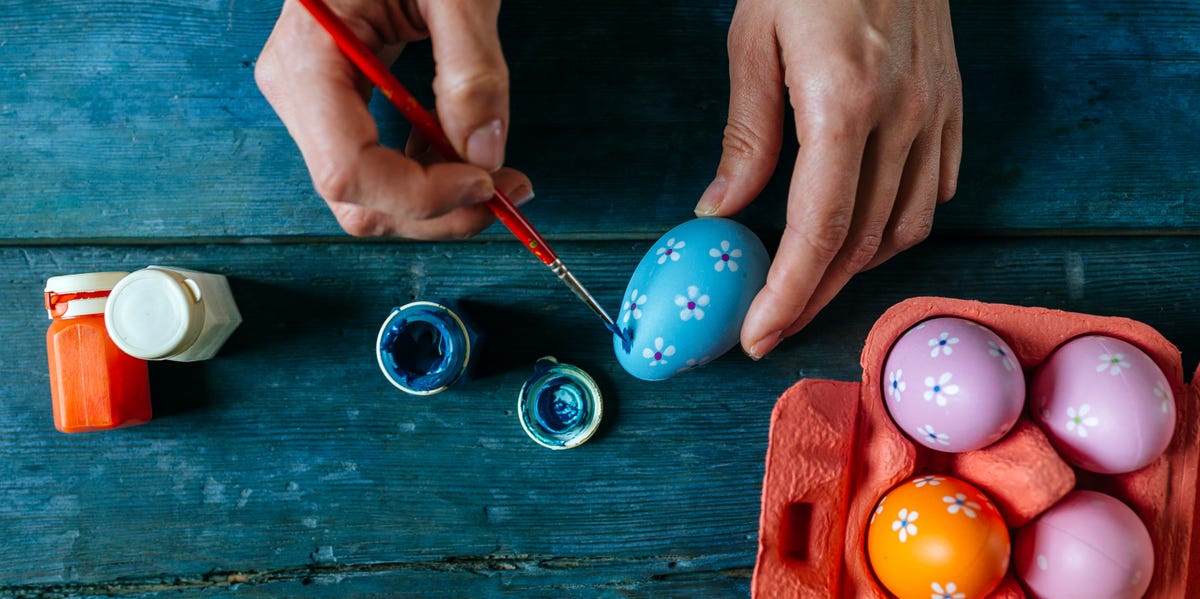
- Two-Tone Painted Easter Eggs: Choose two acrylic paint hues that are either contrasting for a bold statement or complementary for a softer look. Paint the base of some eggs with one color, letting it dry completely. Then, use the second color to paint simple floral patterns, dots, or stripes on top. Reverse the process on other eggs using the second color as the base and the first for the details, creating a beautifully coordinated and varied batch. Consider shades that evoke spring, like pastel pinks and mint greens, or bolder blues and yellows.
If you're eager to discover a broader spectrum of methods and push your artistic boundaries even further, dive into Artistic Easter Egg Painting Techniques You Must Try.
Tips for Crafting Your Easter Egg Masterpieces
To ensure your Easter Egg Painting Ideas come to fruition beautifully, keep these practical tips in mind:
- Patience is a Virtue: Allow each layer of paint or ink to dry completely before adding the next. This prevents smudging and ensures crisp lines and vibrant colors.
- Practice Makes Perfect: If you're attempting a new technique or a complex design, consider practicing on a spare egg or even a piece of paper first.
- Work in Stages: Plan your design. Often, it's best to apply base coats first, then add larger patterns, and finally, the fine details.
- Good Ventilation: When using permanent markers, spray sealants, or certain paints, ensure you're working in a well-ventilated area.
- Seal Your Art (for Keepsakes): For blown eggs, once your designs are fully dry, apply a thin coat of clear sealant or varnish. This protects your artwork, adds a lovely sheen, and ensures your creations last for years.
- Display Creatively: Your finished eggs deserve to be shown off! Arrange them in decorative bowls, nestle them in a bed of faux grass, hang blown eggs from a decorative branch, or use them as unique place settings for your Easter brunch.
Conclusion: Embrace the Joy of Creative Egg Decorating
This Easter, let your imagination take flight and transform ordinary eggs into extraordinary works of art. From the delicate beauty of watercolors to the striking precision of paint markers and the playful texture of puff paint, these Easter Egg Painting Ideas offer a gateway to endless creative expression. Whether you're crafting solo or enjoying a festive family activity, the joy of bringing these unique designs to life is a reward in itself. So, gather your supplies, unleash your creativity, and get ready to create a collection of Easter eggs that are truly one-of-a-kind and sure to spark delight.